

I often get asked, “Can I really make something I’d actually use in just four weeks?” The answer is a resounding yes.
Today, I’m sharing the journey of one of my recent students, Natalie, who joined my Throwing Journey for Adults. Over the course of four sessions, she went from learning how to center a ball of clay to taking home a set of custom-illustrated bowls. Here is a look at her process from start to finish.
Week 1 & 2: Finding the Form
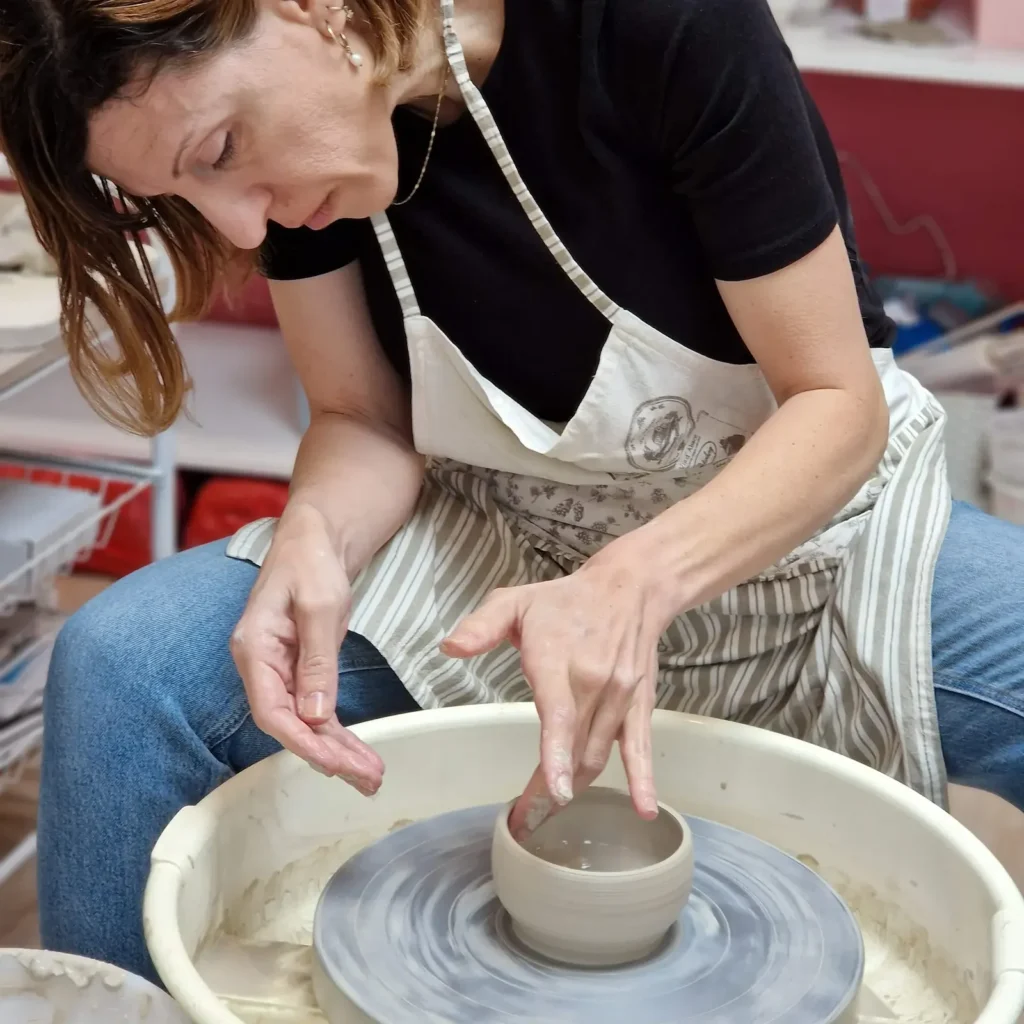
The journey always begins on the wheel. The first few sessions are all about “centering” – getting the clay to cooperate with your hands.
In this photo from the start of the course, you can see the focus required to pull the walls of the bowl up. It’s a delicate balance of strength and gentleness.
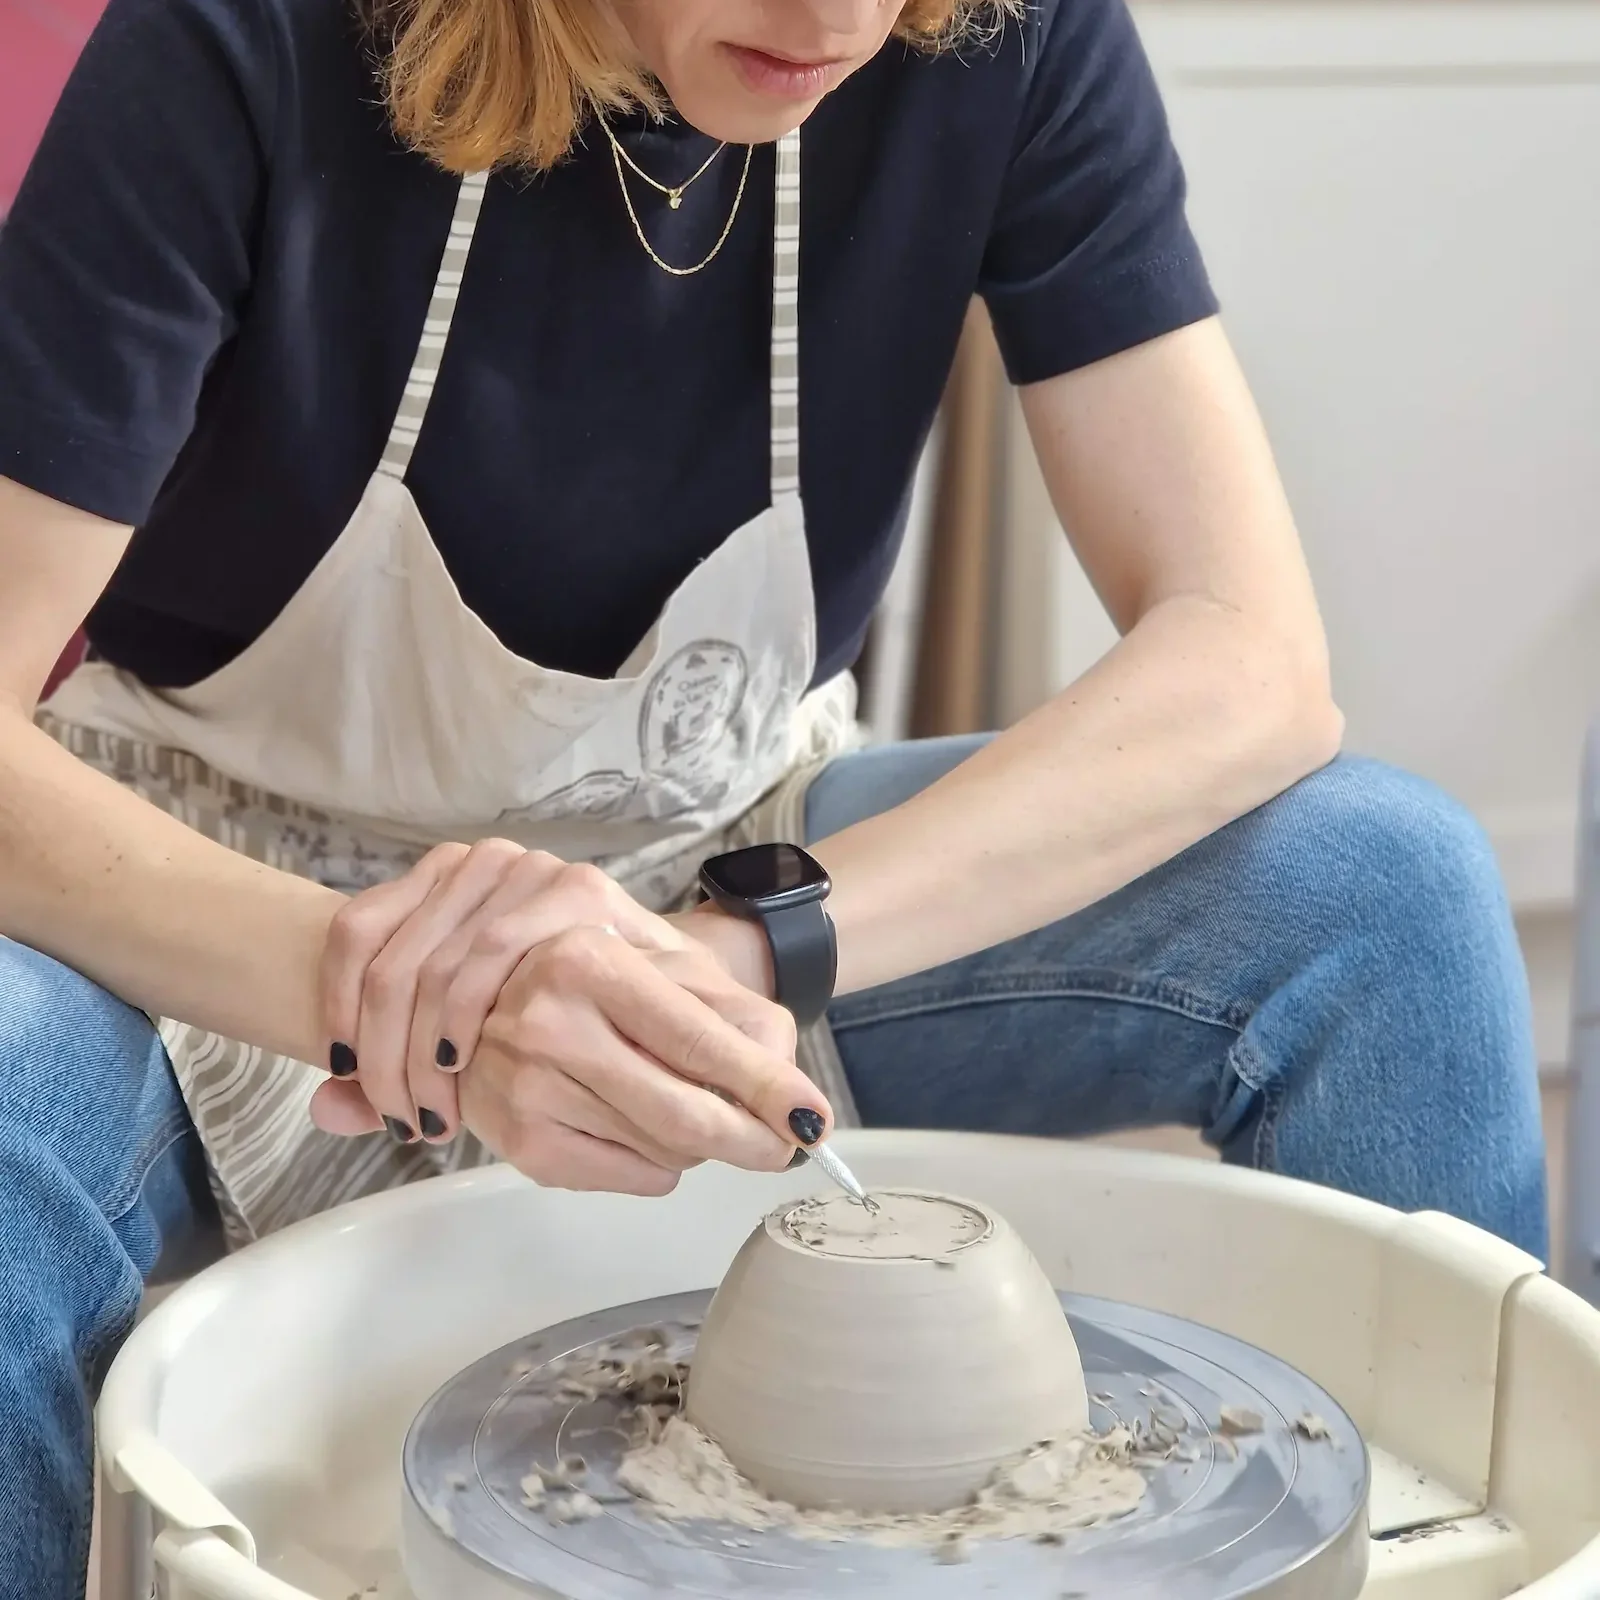
Once the clay has dried to a “leather hard” state (usually by the next session), we move to trimming. This is where we carve away the excess clay to reveal the elegant shape underneath and create a foot ring. It’s often the most satisfying part of the process – watching the ribbons of clay fly off!
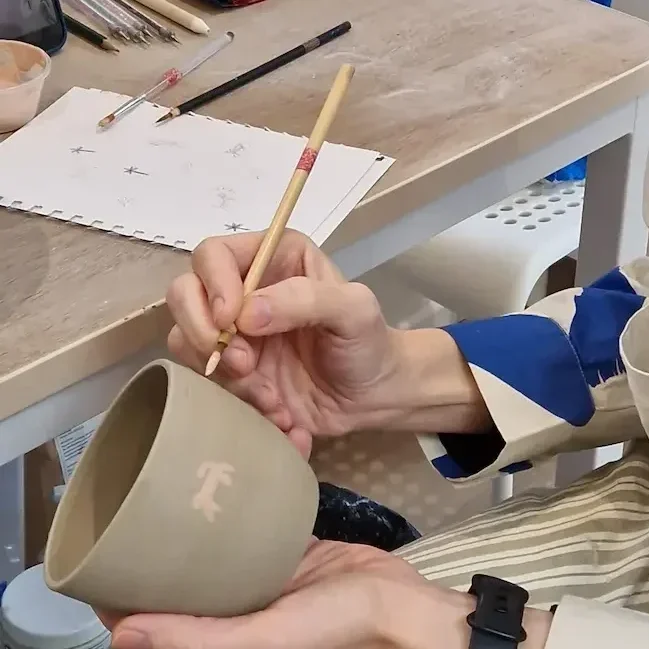
Week 3: Adding Personality
Once the form is finalized, the wheel stops, and the creativity really begins. Natalie chose to hand-paint a delicate tiger design using underglazes. This stage is where a simple clay bowl becomes your bowl.
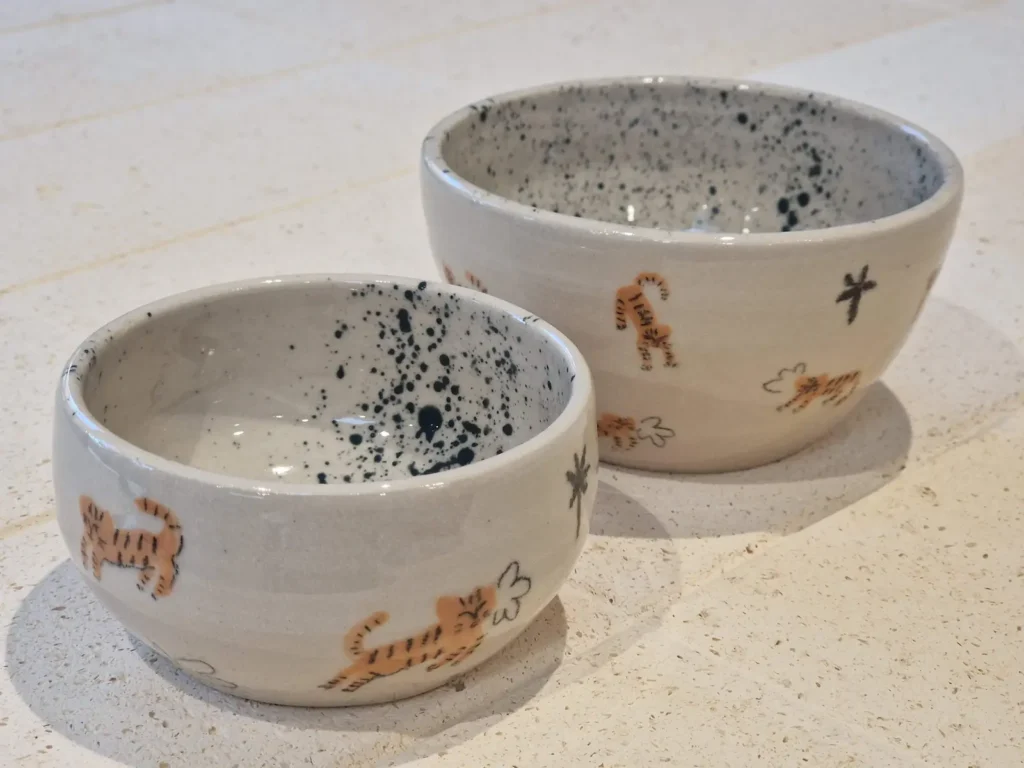
The Final Result
After the final glaze firing, the colours pop, the clay turns to stone, and the piece is ready for the kitchen. Here are the finished pieces: a beautiful set of bowls with a whimsical tiger pattern. They are food-safe, dishwasher-safe, and completely unique.
Start Your Own Journey
You don’t need to consider yourself an “artist” to create something beautiful. You just need to show up and get your hands dirty. Book your spot in the Throwing Journey for Adults :